
How Long Did It Take You To Make That?
- Meg Hepworth
- May 15, 2023
- 4 min read
Firstly, welcome to my blog! I’m determined to think of a catchy title for it, but for the meantime, Blog will do.
I hope to cover all sorts of topics in this blog and you never know, may even venture into the world of Vlogs if I’m feeling devil-may-care enough!
When I was wondering what to write this first entry about, I decided to address the question I’m asked the most, which is ‘how long does it take to make a mug?’
The caveat to this is that we all do it differently! I mainly ‘potter’ at the weekends and the odd evening in the week, so by default, my process is often longer than it could be.

The first, and often unseen stage of making anything from clay is preparation. Fresh out the bag, the clay will need shaping into balls ready to throw. I’ll sometimes give it a bit of a wedge but I’ll talk about wedging another time! At this stage the clay is what’s known as plastic. If I’m making a few mugs that I want to be broadly the same shape and size I will weigh my clay first, the average mug being made from approximately 1lb of clay.

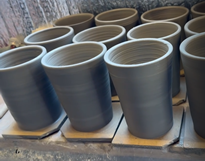
So, it’s weighed and made into balls – the next step is to form the shape on the wheel. The ball is thrown onto the wheel head – it’s more a firm drop than a throw and I always give it a couple of slaps on the top to make sure it’s stuck. I’ll talk in another blog about the actual process of throwing a shape on the wheel, for the purposes of this blog, throwing the actual shape can take (me) between 3 & 5 minutes. It’s then removed and set aside to turn from plastic to leather hard.
I will also at this stage make my handles – I usually pull them (and no, there is no video for that), shape them and wrap them in plastic to allow them to firm a little before they are attached.
Once the mugs are leather hard – and this can take a couple of days in the winter when it’s
damp, when it’s warmer they’re usually good for the next stage within 24 hours - the next step is to refine the shape of the mug from the raw shape that was thrown on the wheel. This is my favourite step! The pot is stuck back on the wheel – there are various methods to do this which, again, I will tell you all about another day... I then trimmed with metal turning tools until the shape is what I’m after – I like to add a foot-ring for example. I then will sponge it to smooth it and finally burnish it with a rubber kidney. This can take up to 5 minutes per mug.
The handle is added at this point and I’ve made no secret of this being my least favourite part of the whole thing. Finally I sponge over the piece to smooth any imperfections, add my makers stamp on the bottom and set it aside to dry naturally. It can take a couple of weeks to dry completely, longer in the damp winters. I have been known to bring things inside and put them by the wood burner, although this isn’t the ideal solution as it can lead to things drying unevenly and cracking.

Once completely dry, the piece are then placed in the kiln for a bisque firing. This is when the kiln goes to 1000*c and the clay changes into ceramic. The firing itself is done overnight and takes approximately 10 hours. It’s then a further 24 hours before it is cool enough to unload. Although now ceramic, bisque ware is still porous and can not be used to hold water. This is why we fire to this temperature before applying glazes - the bisque ware sucks the liquid from the glaze and causes it to stick to the surface of the piece. The downside of this is that dust gets trapped in these pores and can make your glaze surface bubble or pit and so the next stage is to wipe or wash each freshly fired piece and allow it to dry overnight prior to glazing them.
Finally then it's time for glazing. I use a variety of methods, the most straight forward is dipping; but I also use some brush-on glazes and sometimes use tape or wax as a resist to create effects. Dipping is the quickest method and I’ll bore you all with the steps prior to dipping a pot in glaze at another time!
I will then load the kiln again and start the glaze firing. My kiln is set to 1180*c and reaches temperatures of up to 1230*c. It’s a further 24 hours before you can open it and see the results – this is the most anxious time for a potter - it's literally make or break!!
 |  |
A glazed bowl before firing | The same bowl after firing |
Anyway, I hope this gives you an insight into my processes and how long everything takes, from the table above you’ll see that the time I spend making the mug is between 20 & 25 minutes, however the actual time, taking into account that I only work in the shed at weekends and the odd evening, is closer to 3-4 weeks with a prevailing wind!
I hopefully this goes some way to explaining why my mugs cost more than they do in Tesco!
Process | Time |
Clay preparation | 2-3 minutes |
Throwing the initial shape on the wheel | 3-5 minutes |
Drying | 24-36 hours |
Turning | 3-5 minutes |
Adding handle | 5 minutes |
Drying | 1-3 weeks |
Bisque firing and cooling | 48 hours |
Washing bisque ware | 2 minutes |
Glazing ware | 5-10 minutes |
Glaze firing | 48 hours |


Comments